Setting up your vehicle checks solution

How our vehicle check solution works
The MICHELIN Connected Fleet MyConnectedFleet platform and the SmarterDriver mobile app provide a simple, digital process for performing and managing vehicle checks.
Choosing which Vehicles are eligible for Checks
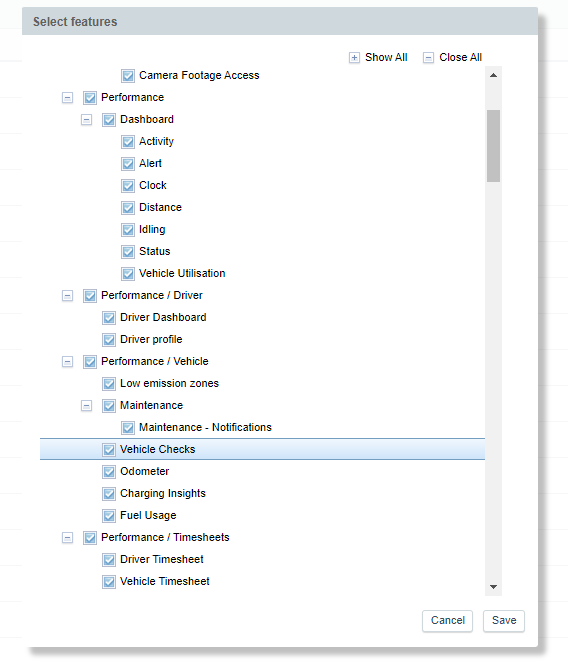
To use MyConnectedFleet to enable Vehicle Checks, go onto the Settings, Alerts and Location section and then go onto Roles > Actions > Select Features and ensure Vehicle Checks are enabled under the Performance/Vehicle section.
In order to use vehicle checks for your fleet, you must select which vehicles you would like to be checked. The enabled vehicles will be the ones available to your drivers in SmarterDriver to select. Drivers will only be shown the vehicles within their group.
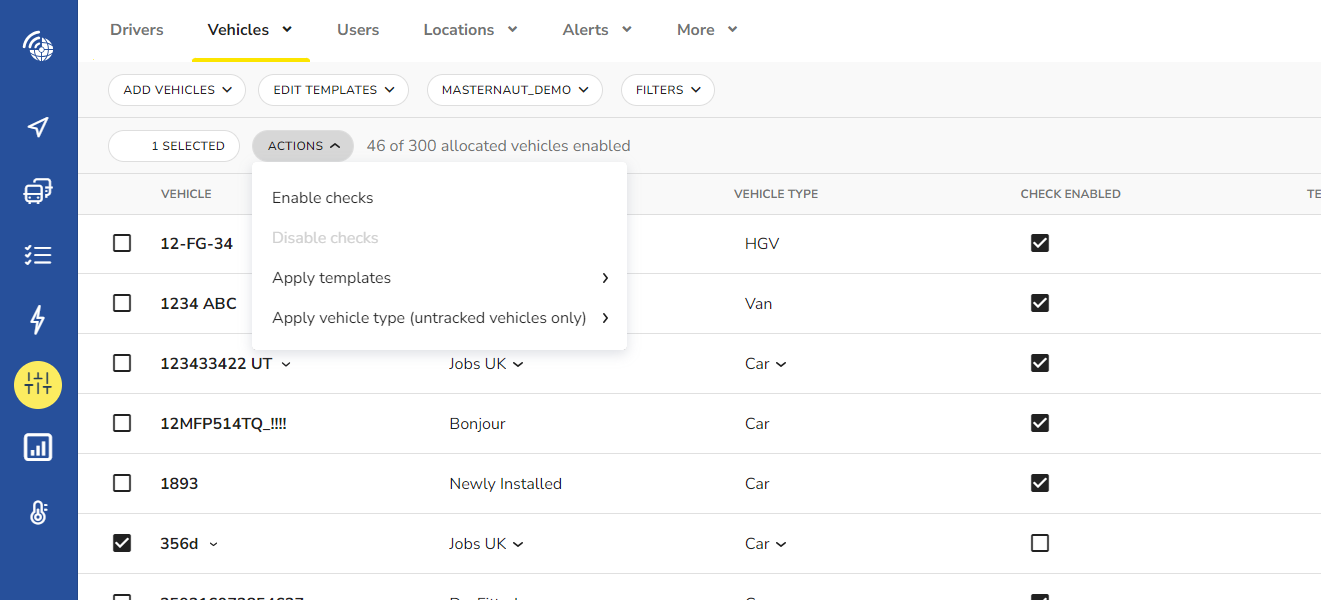
Go to Settings > Vehicle > Checks Settings in your MyConnectedFleet account where you will see the vehicles available in the Vehicle column. You will also see how many vehicles you are able to enable as per your contract.
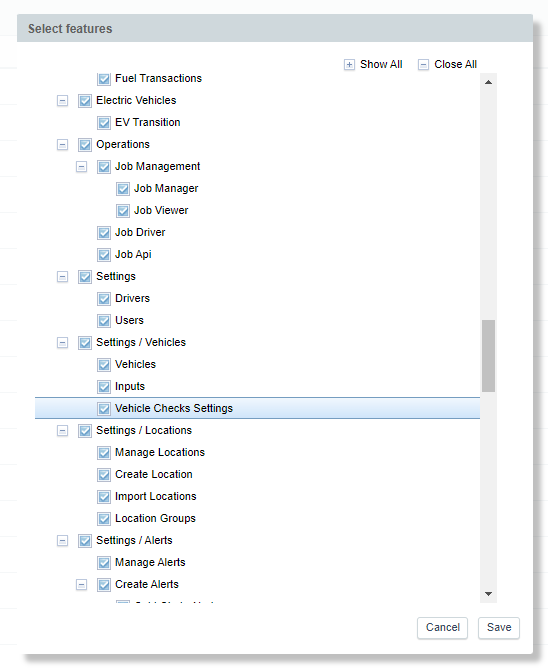
If you do not see this option available, please speak to your administrator to enable this for you. As an administrator, you must enable this role for designated users. Go to Roles > Actions > Select Features and select Vehicle Checks Settings under the Settings group
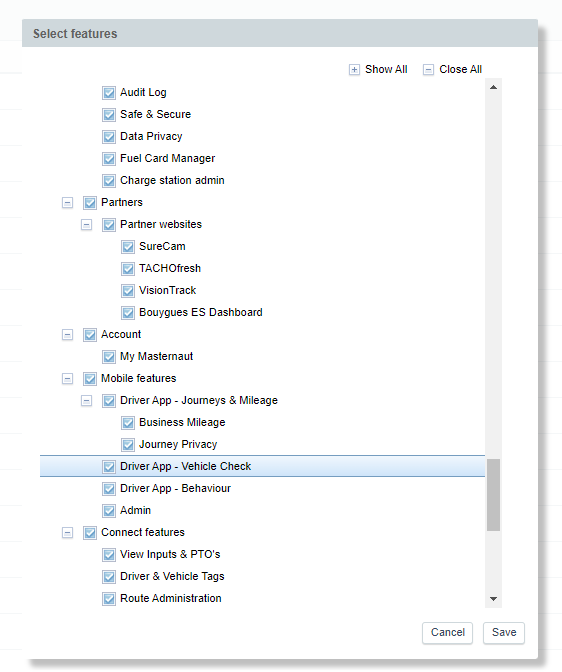
To enable vehicle checks for the users of the SmarterDriver app, go to Roles > Actions > Select Features and then on the Mobile Features group ensure Driver App - Vehicle Check is selected
If you wish to enable or disable a specific vehicle, you can simply find that vehicle and tick the checkbox under the ‘Check Enabled’ column. You can also activate the Filters and hierarchy selector to help you narrow down your vehicles (i.e. by a specific Group). Then use the multi-selection tool on your group to Enable or Disable Checks.
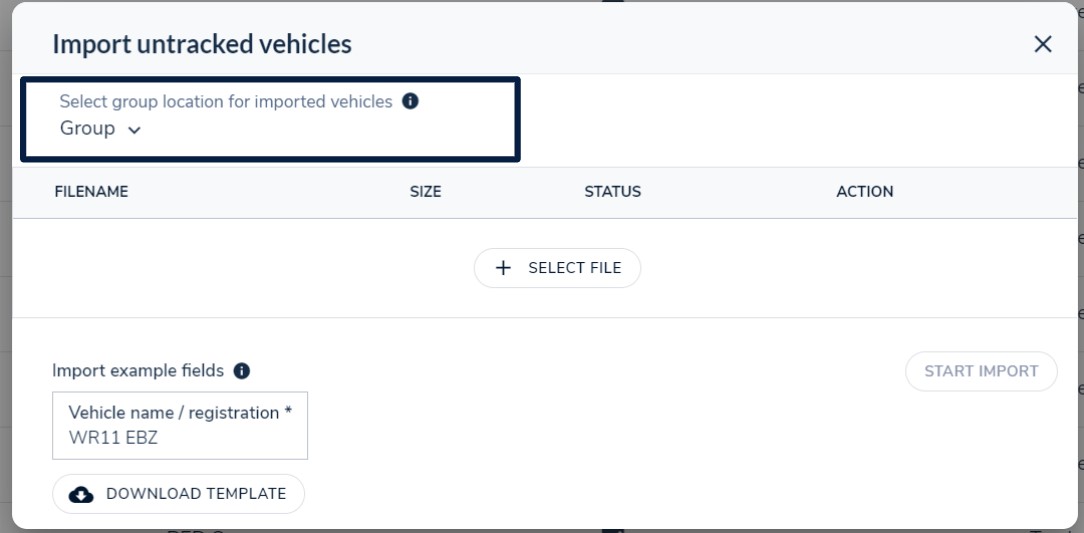
Import untracked vehicles
In order to add vehicles which are not currently tracked by a MICHELIN Connected Fleet telematics device to your vehicle checks list, add them via a .csv import. By selecting the ‘Add Vehicles’ button, you will see the option to ‘Import untracked vehicles.’ After downloading the template file, you will need to provide the name or registration of the vehicles that you wish to import in the specified column.
Whilst in the import section, you will need to select the group that you want these vehicles to belong to. Because they are untracked, these vehicles will only be visible in MyConnectedFleet within the Vehicle Checks solution. Once you have imported these untracked vehicles, you are able to select them in the same fashion as tracked vehicles, and they count towards your entitled enablement of vehicles to check.
Create custom checklists
To create a new customised template, select ‘Edit template’. You can create a new template from scratch by choosing ‘New template’ or you can copy a current template to start from using ‘Duplicate’ (see below).
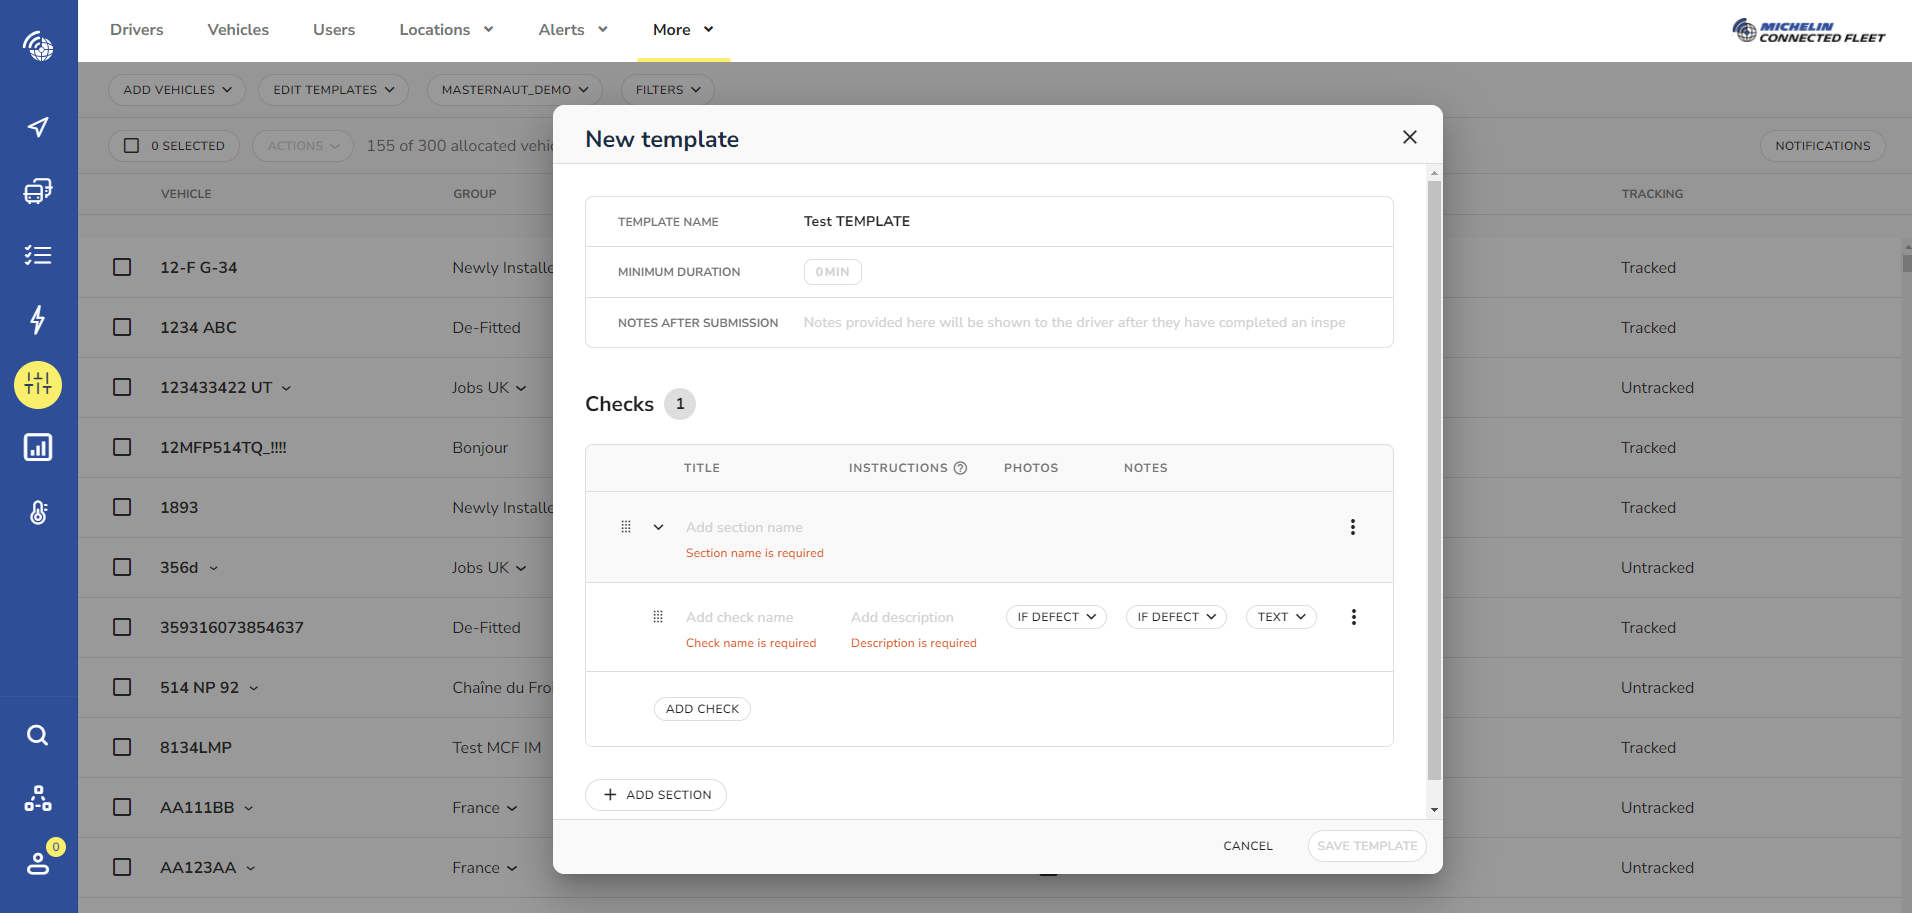
To create a section - a group of certain checks (e.g. Enter cab with engine on) - click on the ‘Add section’ button. Input a description of the section to define what is required for this part of the check. Enter the name of the individual check along with the description of the check. If a photograph or any notes are required you can select on the drop down menu against each item. You can then select if the photograph or notes are required or not, or if these are optional or mandatory in the case of a defect. To add a new check into this section, click on the Add Check button. To reorder the checks, ie the order in which the driver views them on the Smarter Driver App, click on the cluster of dots on the left of the check to drag and drop it in the preferred order.
To save the template, click on the ‘Save’ button within the pop-out.
Set up email notifications
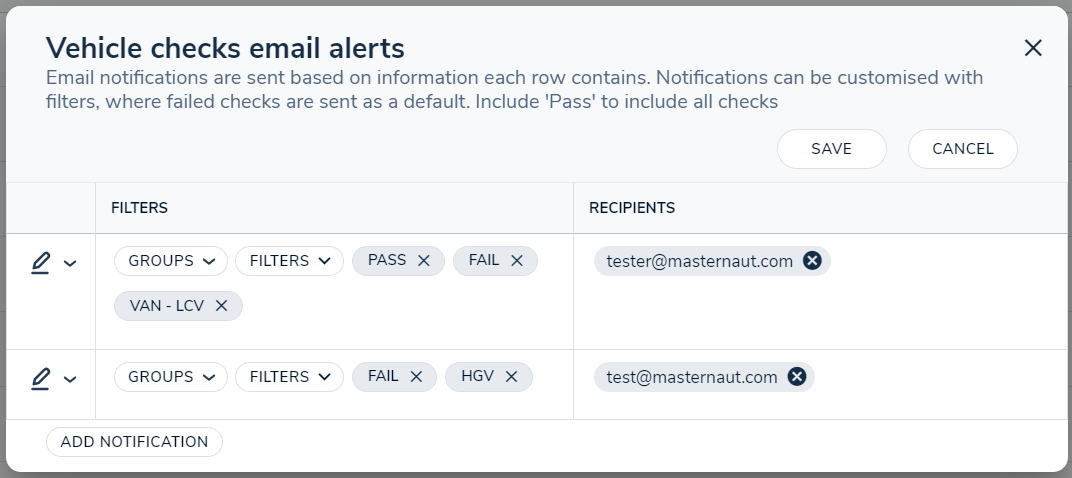
To set-up email notifications, open the Vehicle Checks Settings page, and select 'Notifications'. Checks that have been performed and a defect is raised will be sent by default, where you can add the filter 'Pass' to receive all checks performed.
To make selective email notifications going to recipients, you can select the group that the vehicles belong to via the 'Groups' button. If a vehicle within this group performs a check and it raises a defect, the recipient will receive an email. You can also be specific with the vehicle type of the vehicle, so that notifications are a lot more specific and targeted to certain recipients.
Duplicate the template
If you wish to copy a current template, and use this for a new template you can do so by selecting the ‘Duplicate’ button within the custom template pop-out. The duplication of this will copy all checks and sections from the previous template, and these can then be changed within this newly created template.
Edit existing vehicle checklists
To access your existing vehicle checklists, click on the ‘Edit template’ button and select the template that you wish to make changes to. Once you have made these changes, click on the ‘Save’ button.
Assign the template to a vehicle
Within the column ‘Template’ you will be able to assign templates to vehicles. To do this, select the vehicles within the selection column and then click on 'Actions' and 'Apply Template'.
Select the templates that you want the selected vehicles to have, which will be the templates viewable by the driver within the SmarterDriver app.
N.b. Each vehicle must have at least one template assigned to it, regardless if it's a vehicle that is not enabled for a check.