Creating and Editing Users

What is the purpose of the Users page?
Following your first deployment with MyConnectedFleet, a user has been created for your company (usually the fleet manager or administrator in charge of the deployment).
However, other people may need to have access to your MyConnectedFleet platform (management, managers, site managers, depot managers, drivers, transversal functions (finance, human resources, etc.), etc.).
These people will have specific needs, will subscribe to reports or alerts, and may have restricted visibility on your MyConnectedFleet depending on their role in the company.
Where can I find the Users page?
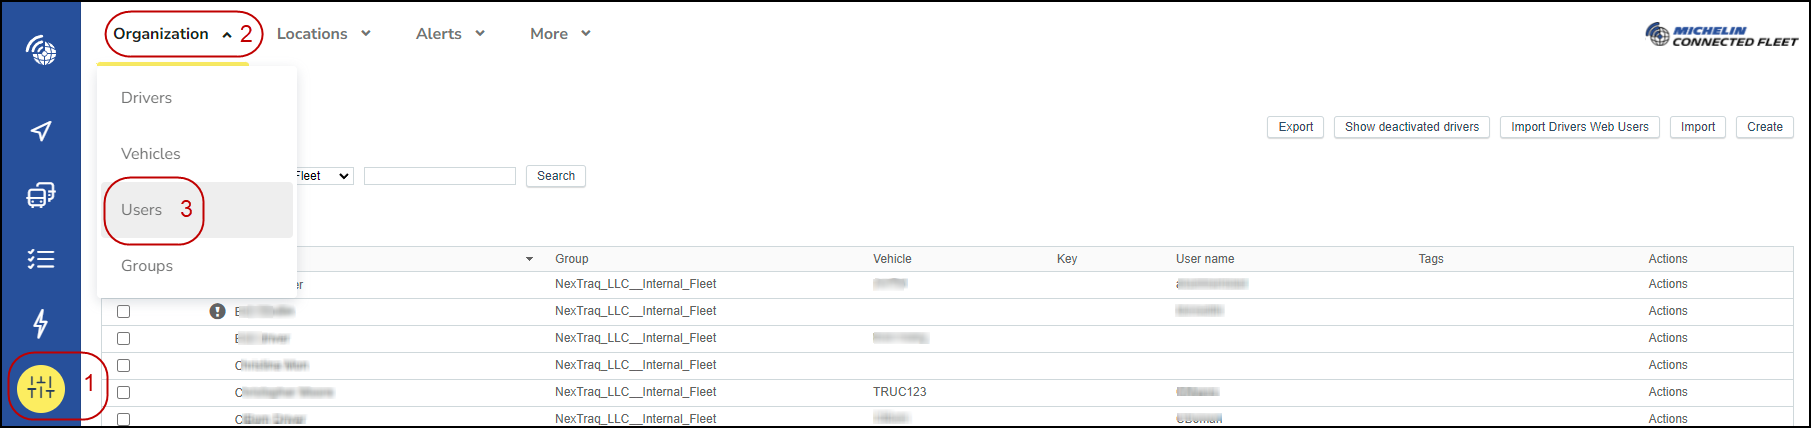
- First click in the main menu (on the left-hand side of the page) on “Settings Alerts & Locations” button
- Second click on the "Organization" drop down menu
- Select the “Users” button
From here you can manage who can access your MyConnectedFleet website.
The image above contains examples of current users that have access to MyConnectedFleet, displaying details of their user's role, the group they belong to and their language and time zone settings.
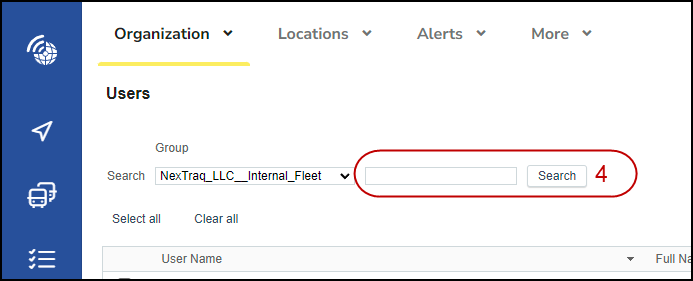
- To quickly find a specific user, put a detail in the search box and click on "Search".
Create a new user
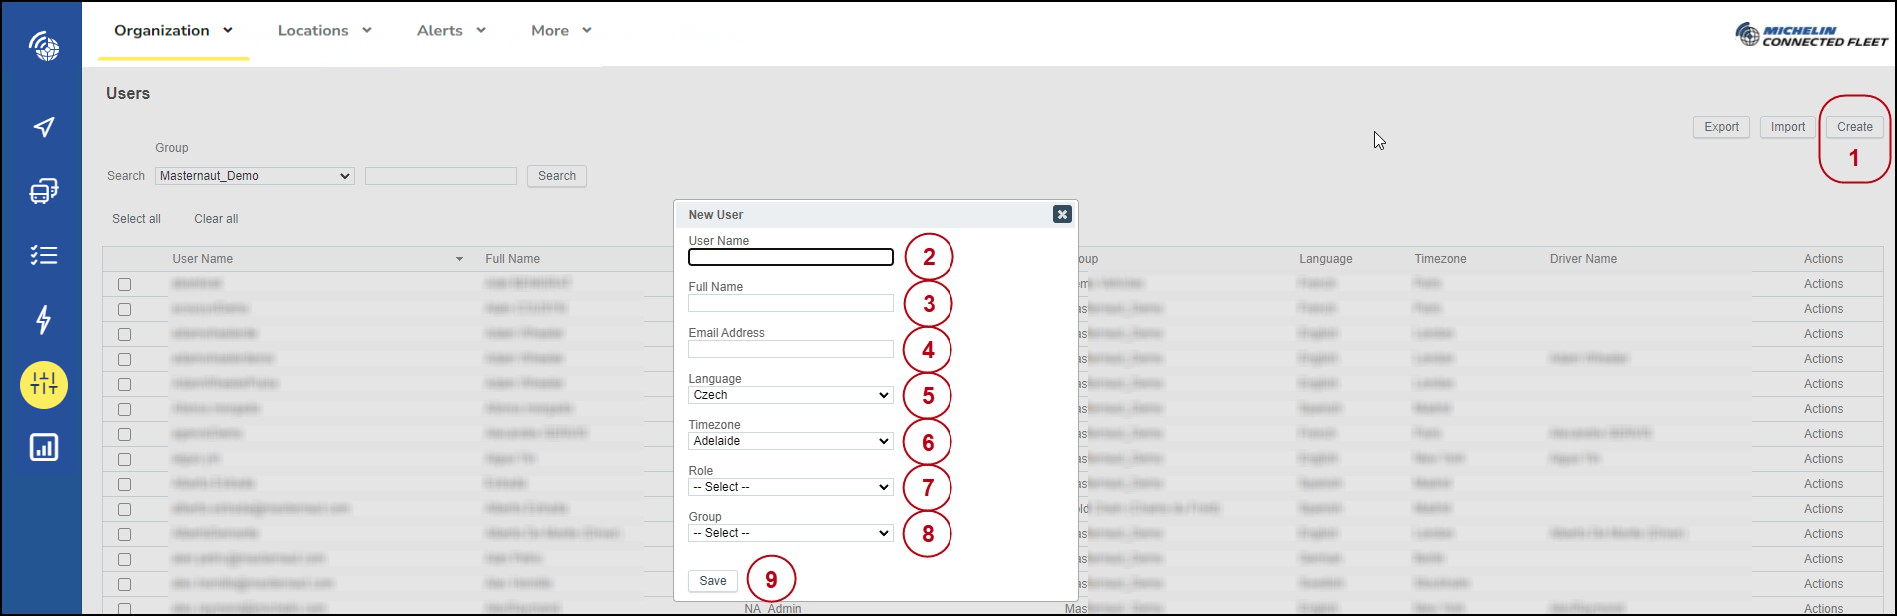
- To add a new user press the Create button
Then fill in the box that appears including giving the new user a role, and which groups within the site they can see.
REQUIRED FIELDS:
- User Name: Although any User Name can be selected, we recommend using the users e-mail address
- Full Name: Users Full Name
- Email address : the user's email address
- Language: Determines the website language for this user
- Time zone: Select Time Zone according to the user's location
- Role: The level of access this user will have to the website features
- Group: The Hierarchy level for this user to limit their view of vehicles.
- Then press "Save" to save your creation
Update or delete existing user
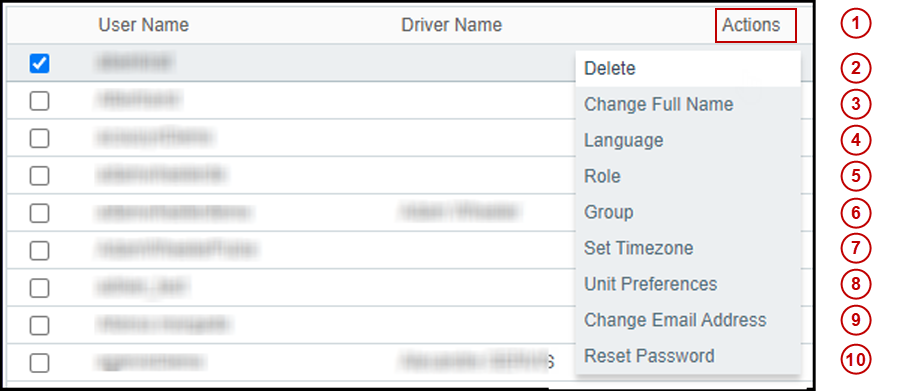
- To edit or delete an existing user, select the "Actions" button on the right hand side of the user
Then select which aspect you wish to change. Make the required changes and click on Save.
- Delete: Will delete existing user
- Change full name: Update full name of the user
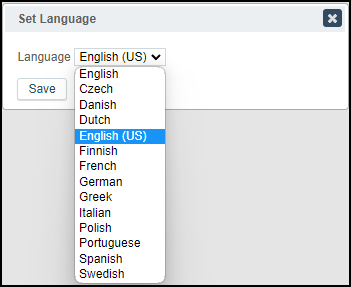
- Language: Determines the MyConnectedFleet website language for this user
- Role: Set role for this user
- Group: Assign the group attached to this user (the Hierarchy level of the group limits the view of vehicles for the user)
- Set time zone: Set time zone
- Unit preferences: Set Distance, Fuel, Fuel Consumption and Speed parameters for the user
- Change email address: Change user's email address
- Reset password: Reset password for the user. An email will be sent to the email address set up for this user
Bulk uploading a user list
- To bulk upload a list of Users, navigate to Settings, Alerts & Locations in your menu bar and then click on Users to open the Users page.
- Click on the Import button on the upper right section of the page.

- This will open the Import Users page. Here you can click on Download sample CSV file to download a template to your computer that you can use as a guide to create your User upload CSV file.


The sample file below contains a top (header) row. You should not remove this row. Place your first user in the row below the header.
The users list must be the first worksheet (Sheet 1).
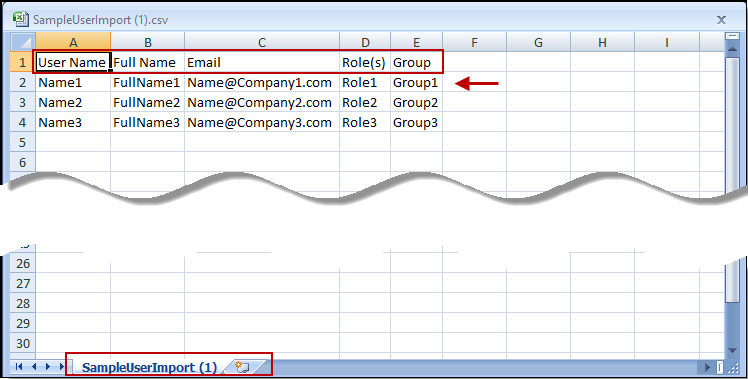
The user list must contain:
a. User name (what they will log in with)
b. Full Name
c. Email (make sure this is correct as it will be the email used for password resets)
d. Role Name
e. Group Name

- Once you have your upload list completed, save it to your computer.
- On the Users page, click on Import.

- This will open the Import Users page. Click on the Browse button on the upper right side of the page and navigate to the location on your computer where you saved your User CSV file.
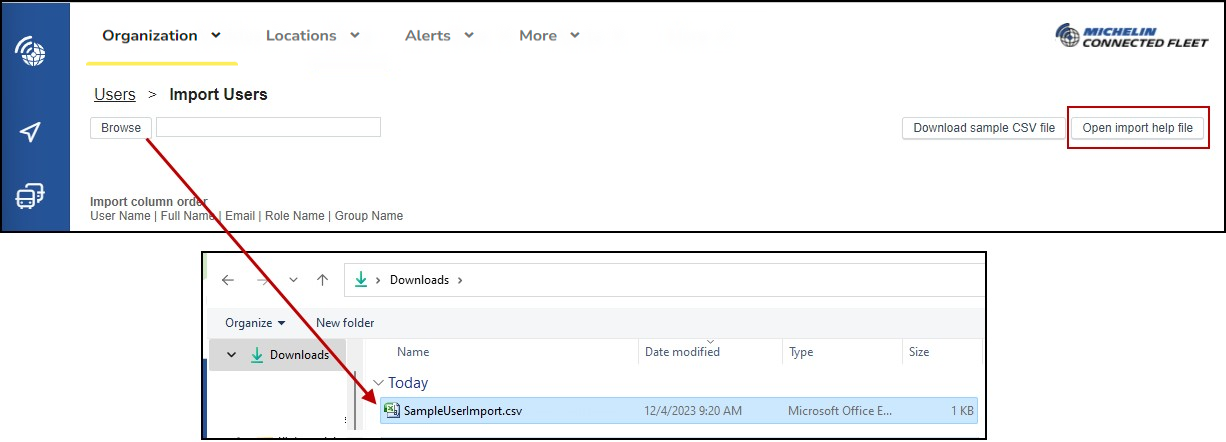
- Click on the file and the file name will appear next to the Browse button (see example below).

- Once you have selected the user list file, you will then have to complete the Web User Settings drop down boxes that appear.
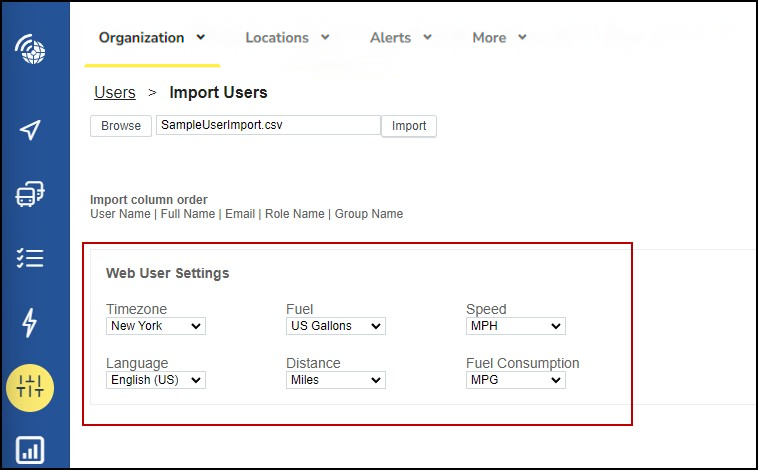
- Once you have updated the web user settings, click the Import button to import your users.
- Once the import is compete, a summary will display that shows:
a. Total records contained in the file
b. Total records imported
c. Total invalid records
d. There is also a section dealing with invalid records. Pressing the Download Log button enables you to download the records that have failed.

- Below is an example of the error log file. You can directly fix the error and resubmit the file to perform the import on the records that weren't initially imported.
