Locations POI

- What are Locations?
- How do I organize multiple locations?
- How do I manage location groups?
- How do I add a location?
- Adding a location via the map
- Adding a location via the manage location page
- Adding a location via the API
- Adding a location via the file import
- How do I view a location I've added?
- How do I edit a location I've added?
- How do I remove a location I've added?
- Search Locations
- How do I check if a vehicle is at a saved location?
What are Locations?
In the MyConnectedFleet application, Locations are specially tagged places on the map that facilitate fleet tracking. Vehicles in the proximity of a location are automatically associated with it.
Locations are typically starting and end points (depots, warehouses, client addresses, customer addresses), but can also be frequent stop points (gas stations, hotels, car parks, truck stops, weigh stations). Each location is associated with a predefined location type.
How do I organize multiple locations?
Locations are organized by groups. Within MyConnectedFleet there are a default set of Location groups. These are:

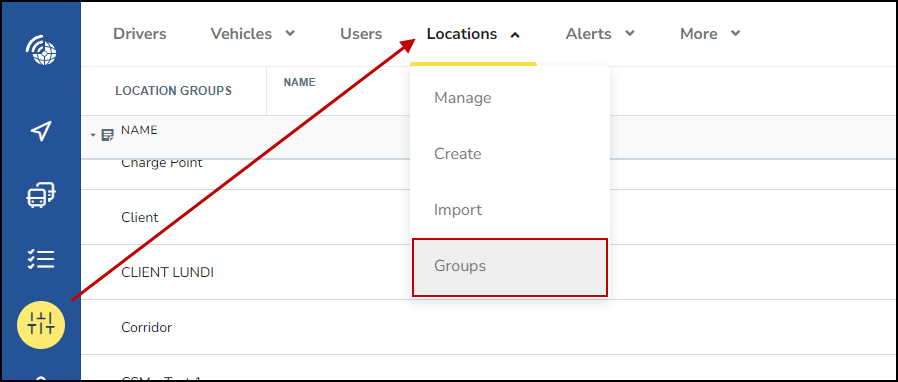
How do I manage location groups?
Location groups can be added or edited by going to Settings, Alerts, & Locations > Locations > Groups on your menu.
From the “Groups Page” the list of the existing location groups are currently displayed. Existing groups can be edited or deleted by clicking on the pencil "edit" icon.
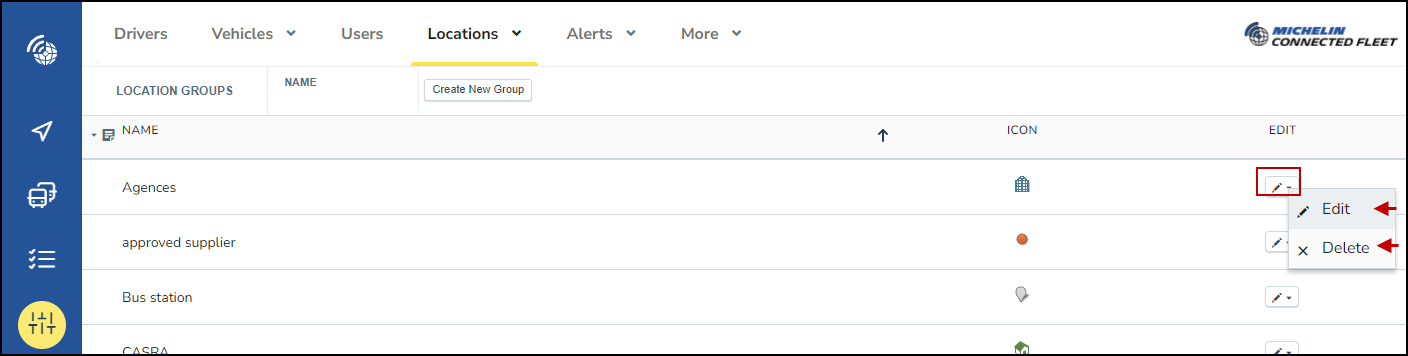
To add a new location group click the "Create" icon. You will then need to add in a location group name and select an icon for the newly created group.
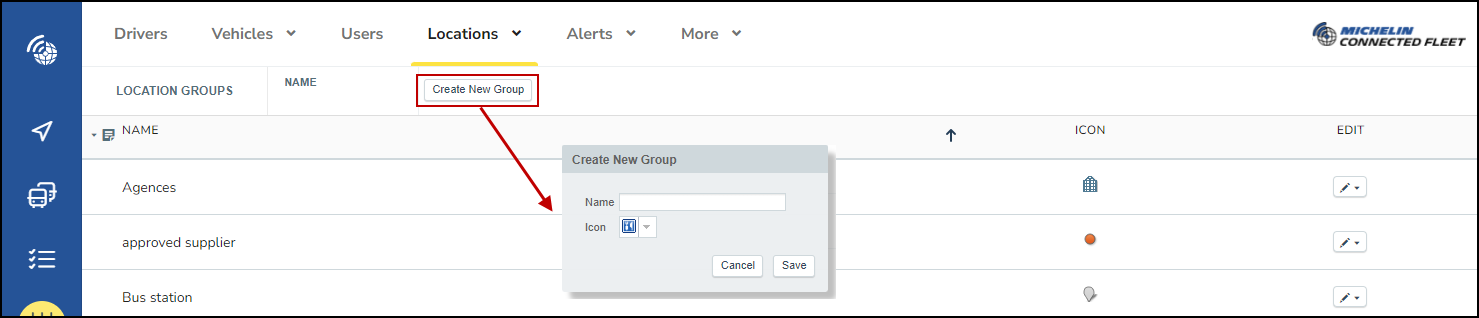
New location groups must have a name and an icon selected before they can be added
How do I add a location?
Locations within MyConnectedFleet can be added in 4 main ways:
- Via the “Manage Locations Page”
- Via any page with a map
- Via the APIs
- Via a file import
Adding a location via the map
New locations can be added from any map view by left clicking on the map and then selecting "Add location".
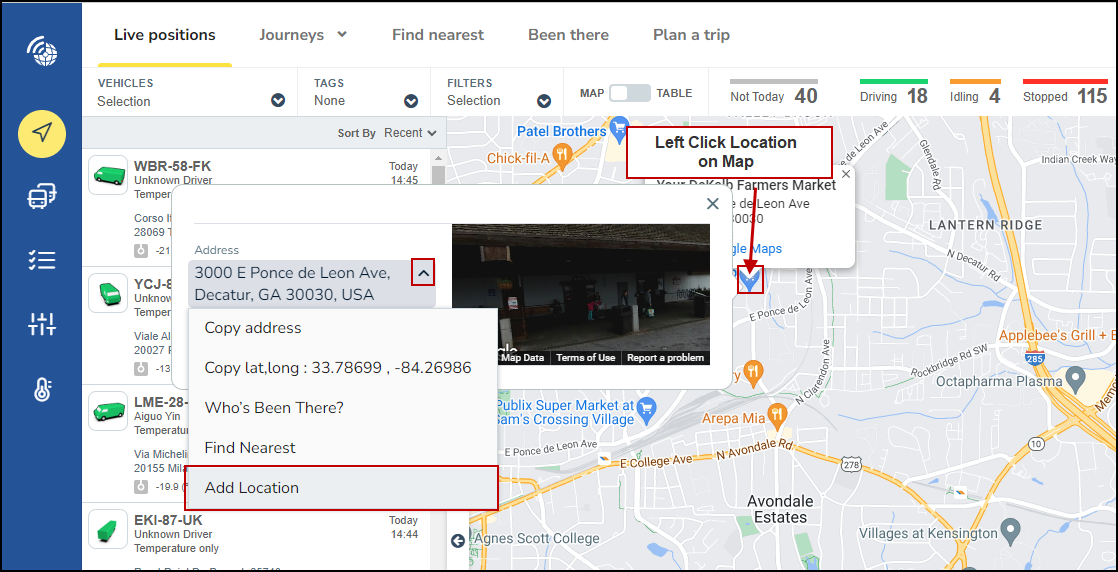
When on a map view within MyConnectedFleet such as the live location page, left click on the place within the map where you want to add a new location. This will bring up an Address box and view of the location.
Click the drop down arrow next to the address and select “Add location”.
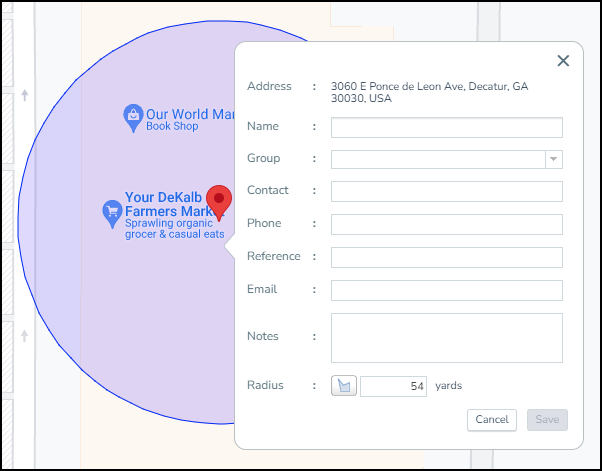
After clicking add location a pop up box will appear with the following fields:
- Address - this is populated automatically
- Name - this is what the location will display as in your MyConnectedFleet
- Group - this is a pull down choice (additional groups can be added from the Group menu)
- Contact - is an optional field
- Phone - is an optional field (do not enter any dashes)
- Reference - is an optional field
- Email - is an optional field
- Notes - is an optional field
- Radius - this is the area around the location - this is 54 yards by default.
Once all relevant fields are filled out click the save button and the location will be added to your MyConnectedFleet.
Adding a location via the manage location page
New locations can be added from the Setting, Alerts, and Locations menu page.

Within the Locations menu click the down arrow icon and select “Create”. This will open a map view. On the map, zoom in and left click where you want to add the new location.

After clicking the add location a pop up box will appear with the following fields:
- Address - this is populated automatically
- Name - this is what the location will display as in your MyConnectedFleet
- Group - this is a pull down choice (additional groups can be added from the Group menu)
- Contact - is an optional field
- Phone - is an optional field (do not enter any dashes)
- Reference - is an optional field
- Email - is an optional field
- Notes - is an optional field
- Radius - this is the area around the location - this is 54 yards by default.
Once all relevant fields are filled out click the save button and the location will be added to your MyConnectedFleet.
Adding a location via the API
In order to do this you will need to have access to the APIs via your account - speak to your MICHELIN MyConnectedFleet Account manager for further information.
Adding a location via the file import
When wanting to add more than one location at the same time the “Import Locations” function can be used.
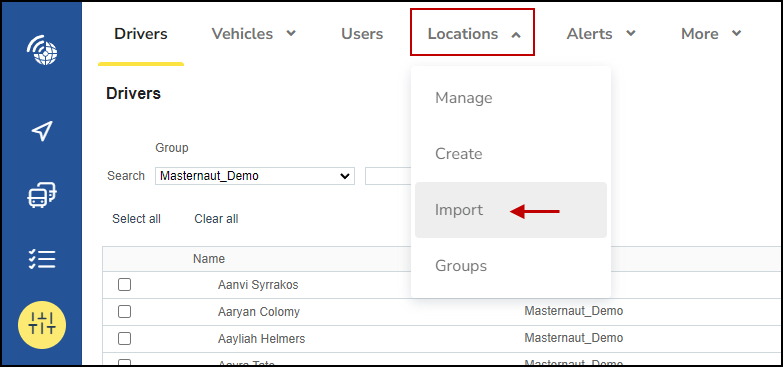
Within the Locations menu click the down arrow which is found in the “Locations” heading - this will open a pull down menu where “Import” should be selected.
After selecting the “Import” option the Import Location page will load.
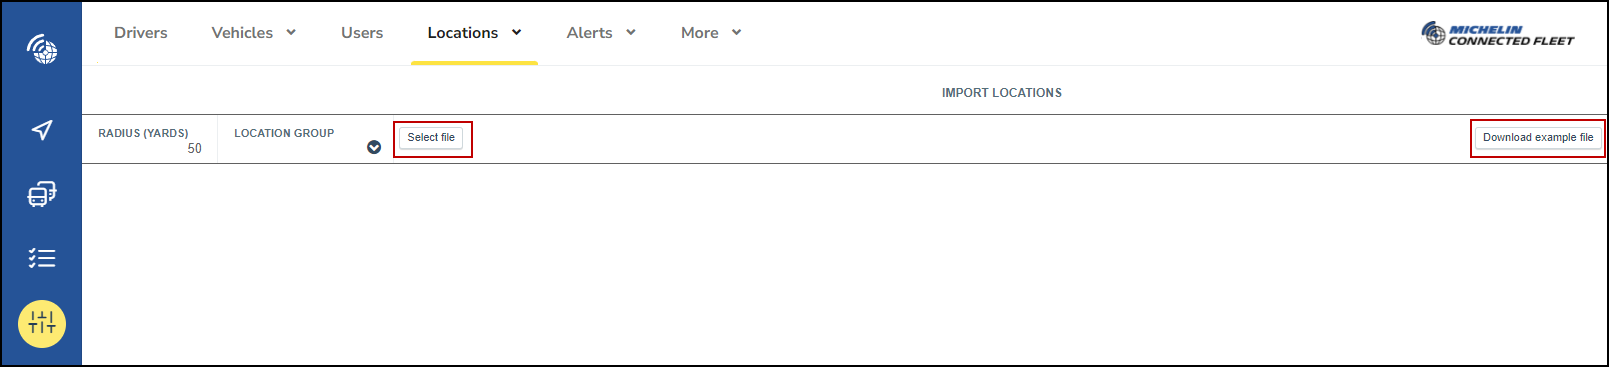
Radius and Location Group are defined for all locations when using the import
When importing locations it is useful to use the example file as a template. This can be found in the top right corner of the screen.
After clicking the "Download example file" button your browser will download the example file in CSV format. The downloaded file link will display on the lower left corner of your screen. The file can be opened using a program such as Microsoft Excel.
The example file contains all the fields which can be populated when adding a location.
Once you have populated and saved your template, you will click Select file and choose the file you saved to upload the locations.
How do I view a location I've added?
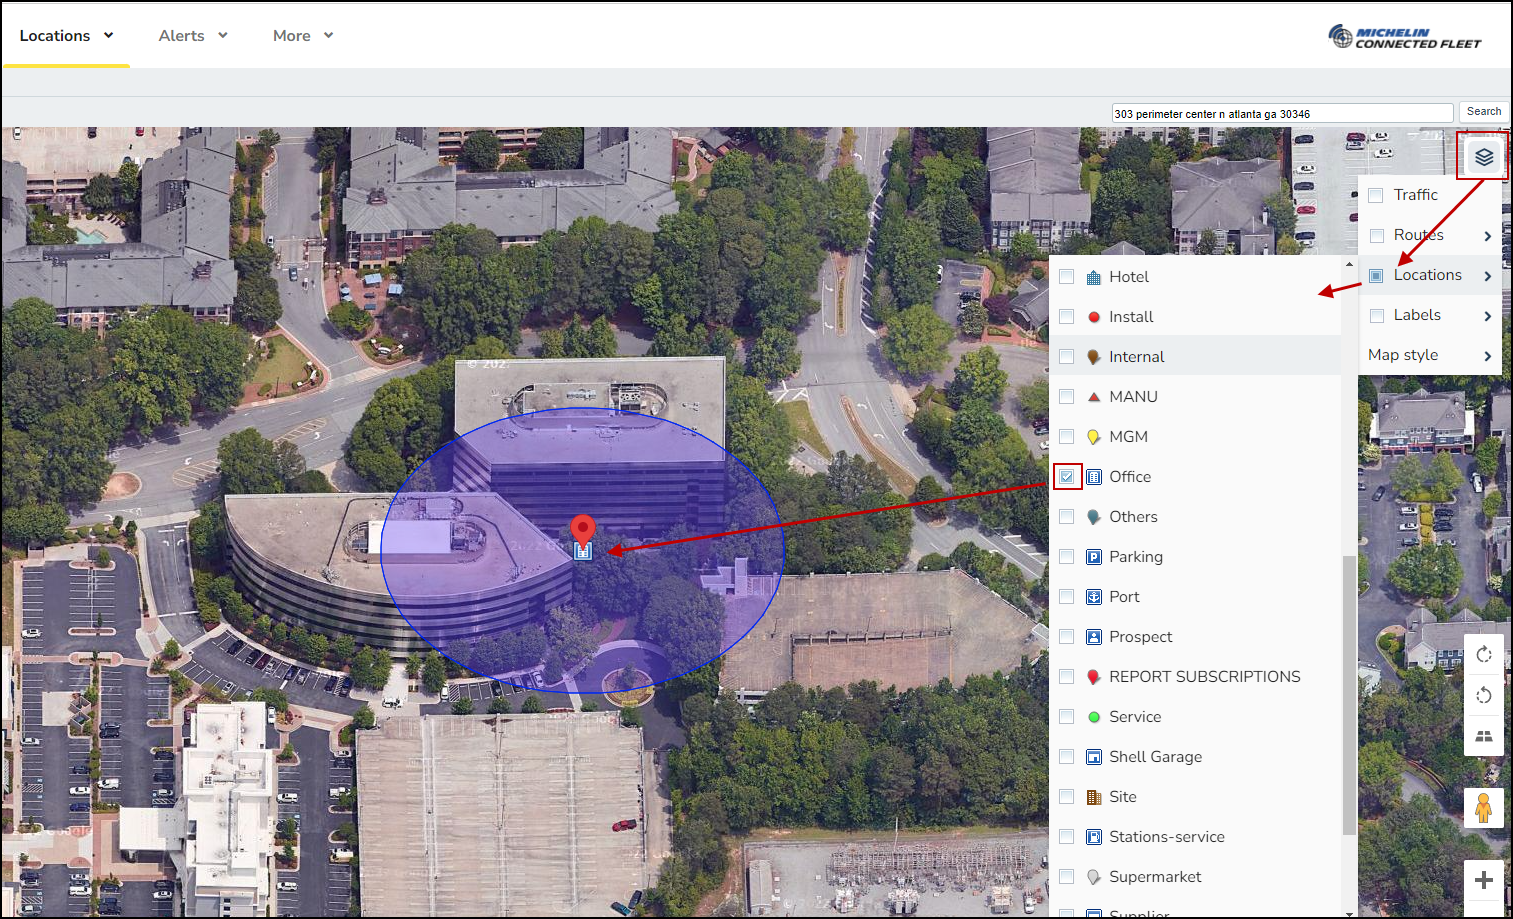
To view your added locations in MyConnectedFleet; from the map page click the layer icon in the top right hand corner and then enable locations by using the tick box. Locations will now be viewable on the maps.
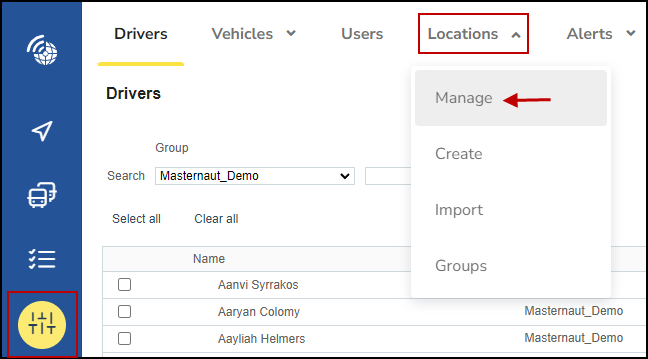
To view your list of added locations, Click on Settings, Alerts & Locations on the main menu. Then select Locations and choose Manage in the dropdown list.

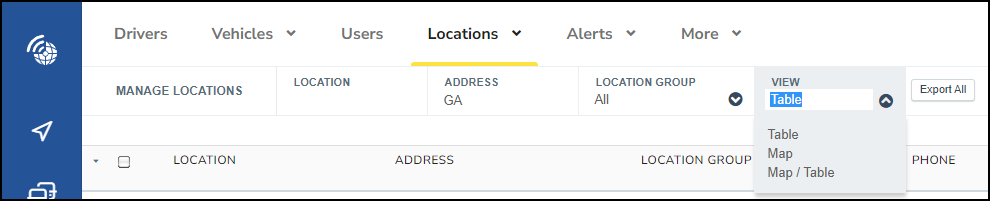
The manage locations page
On the manage locations page there are 3 different view options, these are:
- Map
- Table
- Map/Table
The view option can be changed on the “Manage Locations” ribbon menu.
The manage locations ribbon
How do I edit a location I've added?
From the “Manage Locations Page” there will be a table containing the existing locations. Existing locations can be edited by clicking on the "pencil" icon and selecting the "edit" option.

Edit location page
This will open the edit location pop up on a map view.
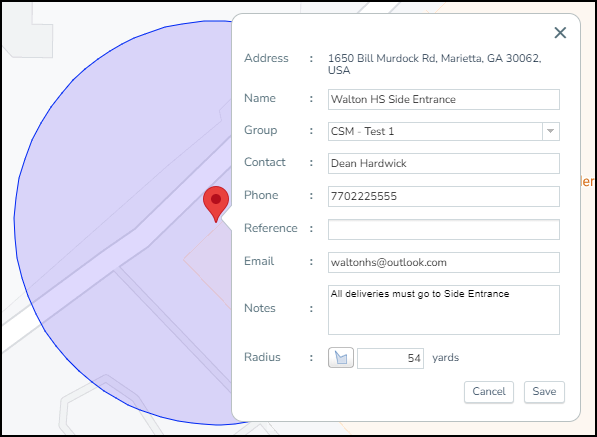
Once all the changes are made, click on Save.
How do I remove a location I've added?
Locations can be deleted via the Locations page.

From the “Manage Locations Page” there will be a table containing the existing locations. Existing locations can be deleted by clicking on the "pencil" icon and clicking the "delete" option this will open a confirmation pop up. Once a location has been deleted it will need to be added to the system again.
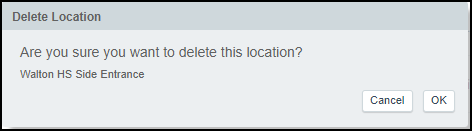
The confirmation pop-up shows the name of the location selected to be deleted.
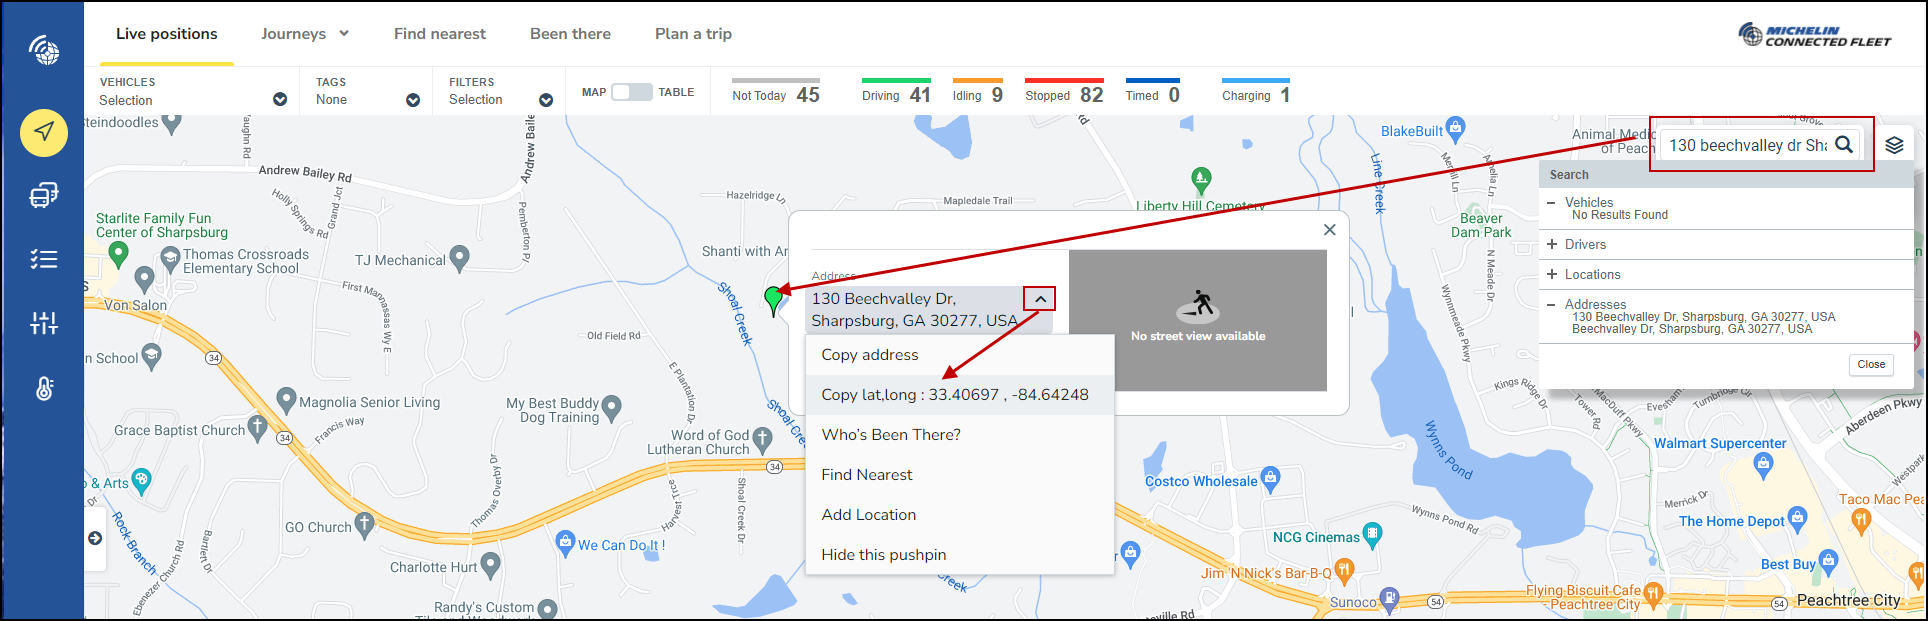
Search Locations
Within any page of the MyConnectedFleet application, it is possible to use the “Advanced Search” functionality.
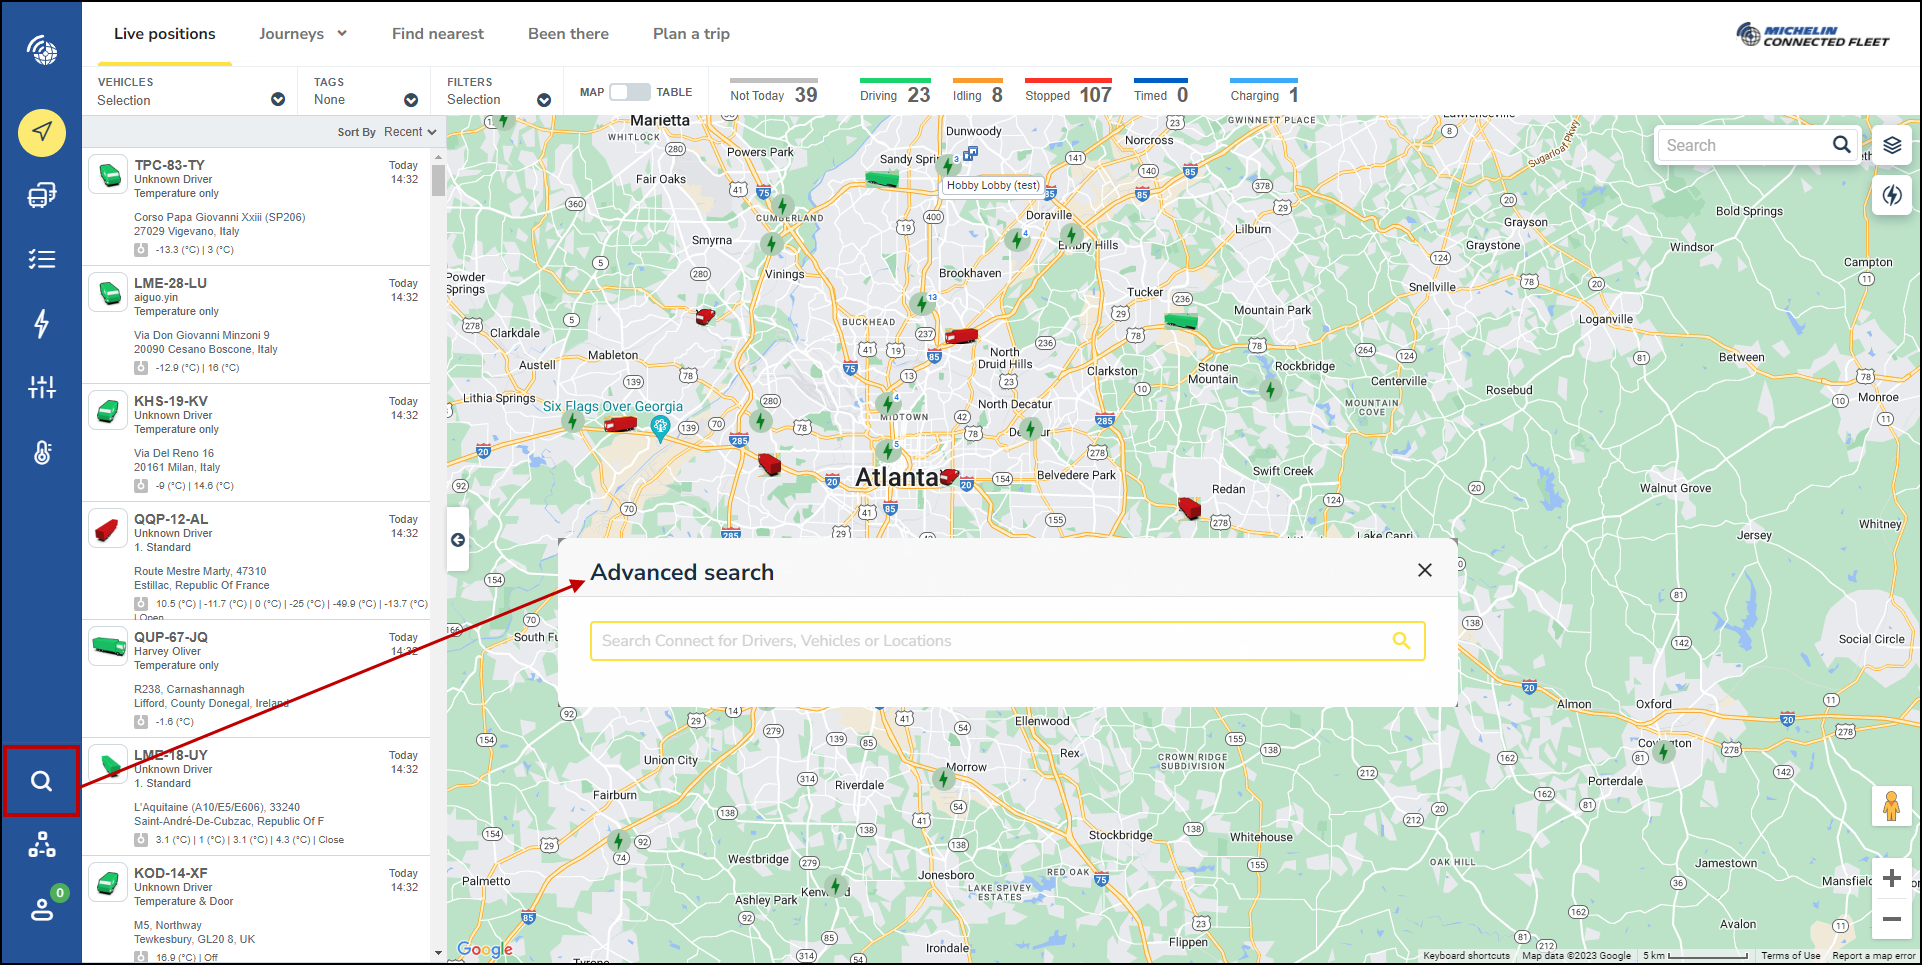
Clicking the "search" icon will open a search window. Within the search window you can start to type the location name and the search window will automatically begin to generate the search results within the window.
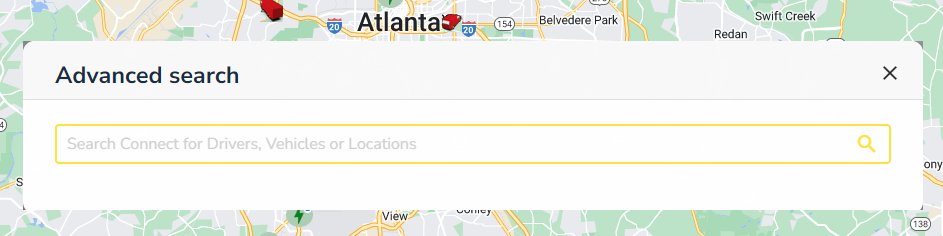
The advanced search window
How do I check if a vehicle is at a saved location?
The vehicle list panel is opened and closed from the map view.
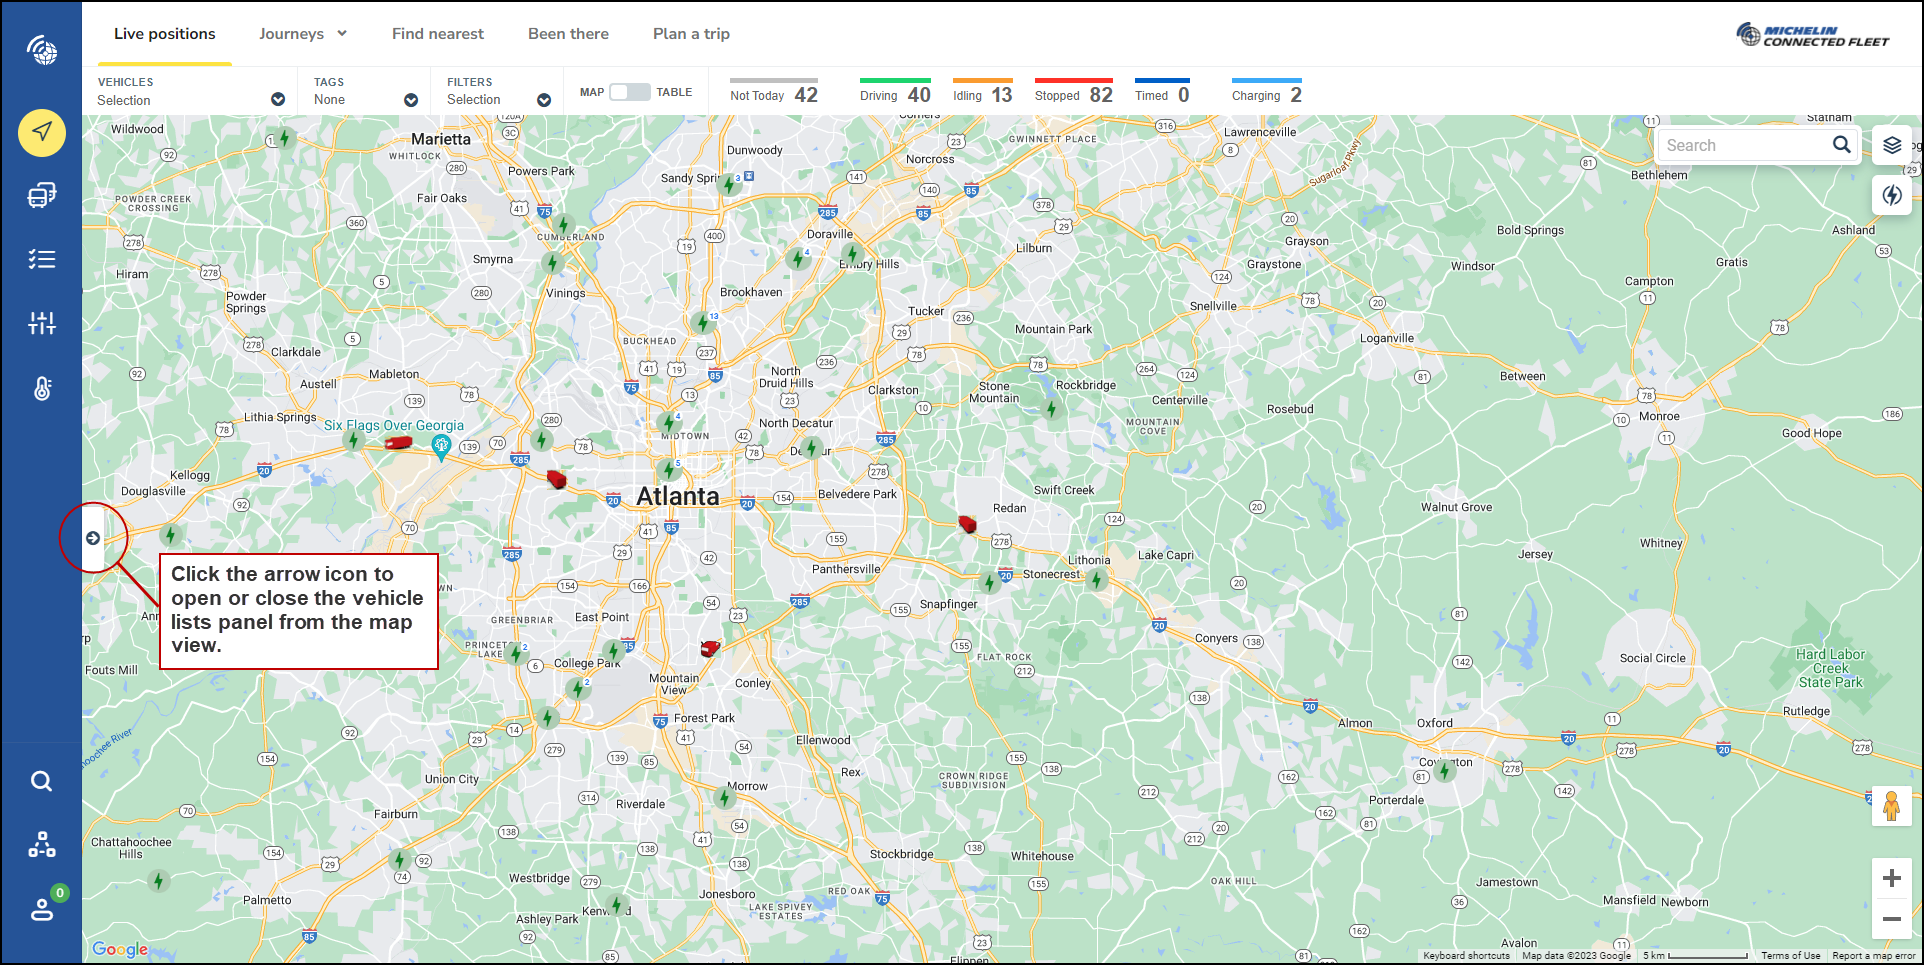
When the vehicle list panel is visible, you can view a list of vehicles and their current location. Where a vehicle is at a saved location it will display the Name and Icon of the saved location (see example below).