Adding a location via the file import
Adding a location via the file import
When wanting to add more than one location at the same time the “Import Locations” function can be used.

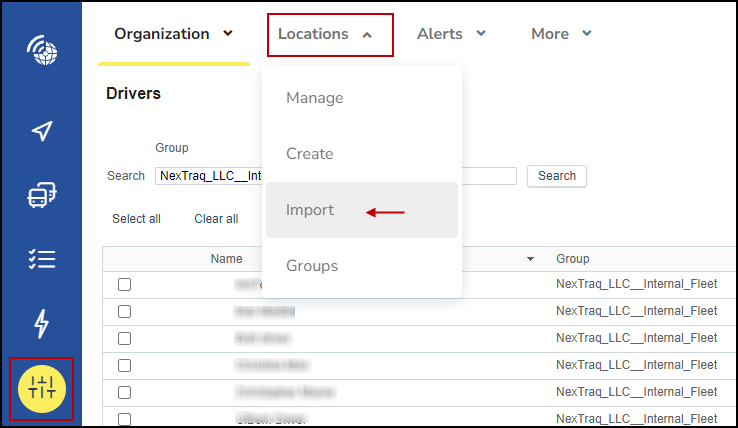
Within the Locations menu click the down arrow which is found in the “Locations” heading - this will open a pull down menu where “Import” should be selected.
After selecting the “Import” option the Import Location page will load.

Radius and Location Group are defined for all locations when using the import
When importing locations it is useful to use the example file as a template. This can be found in the top right corner of the screen.
After clicking the "Download example file" button your browser will download the example file in CSV format. The downloaded file link will display on the lower left corner of your screen. The file can be opened using a program such as Microsoft Excel.
The example file contains all the fields which can be populated when adding a location.
Once you have populated and saved your template, you will click Select file and choose the file you saved to upload the locations.

